Showing posts with label sewing. Show all posts

Sunday, 4 March 2018

The Morgan Jeans by Closet Case Patterns


I put these jeans on my make nine mostly out of fear, and I thought if I put them on my make nine it might push me out my comfort zone. What was I so scared about?!

I decided on the Morgan's jeans as I had heard so much about the Ginger jeans but didn't think my Booty would look particularly flattering in skinny jeans but the Morgan Jeans Boyfriend fit jeans appealed to me!
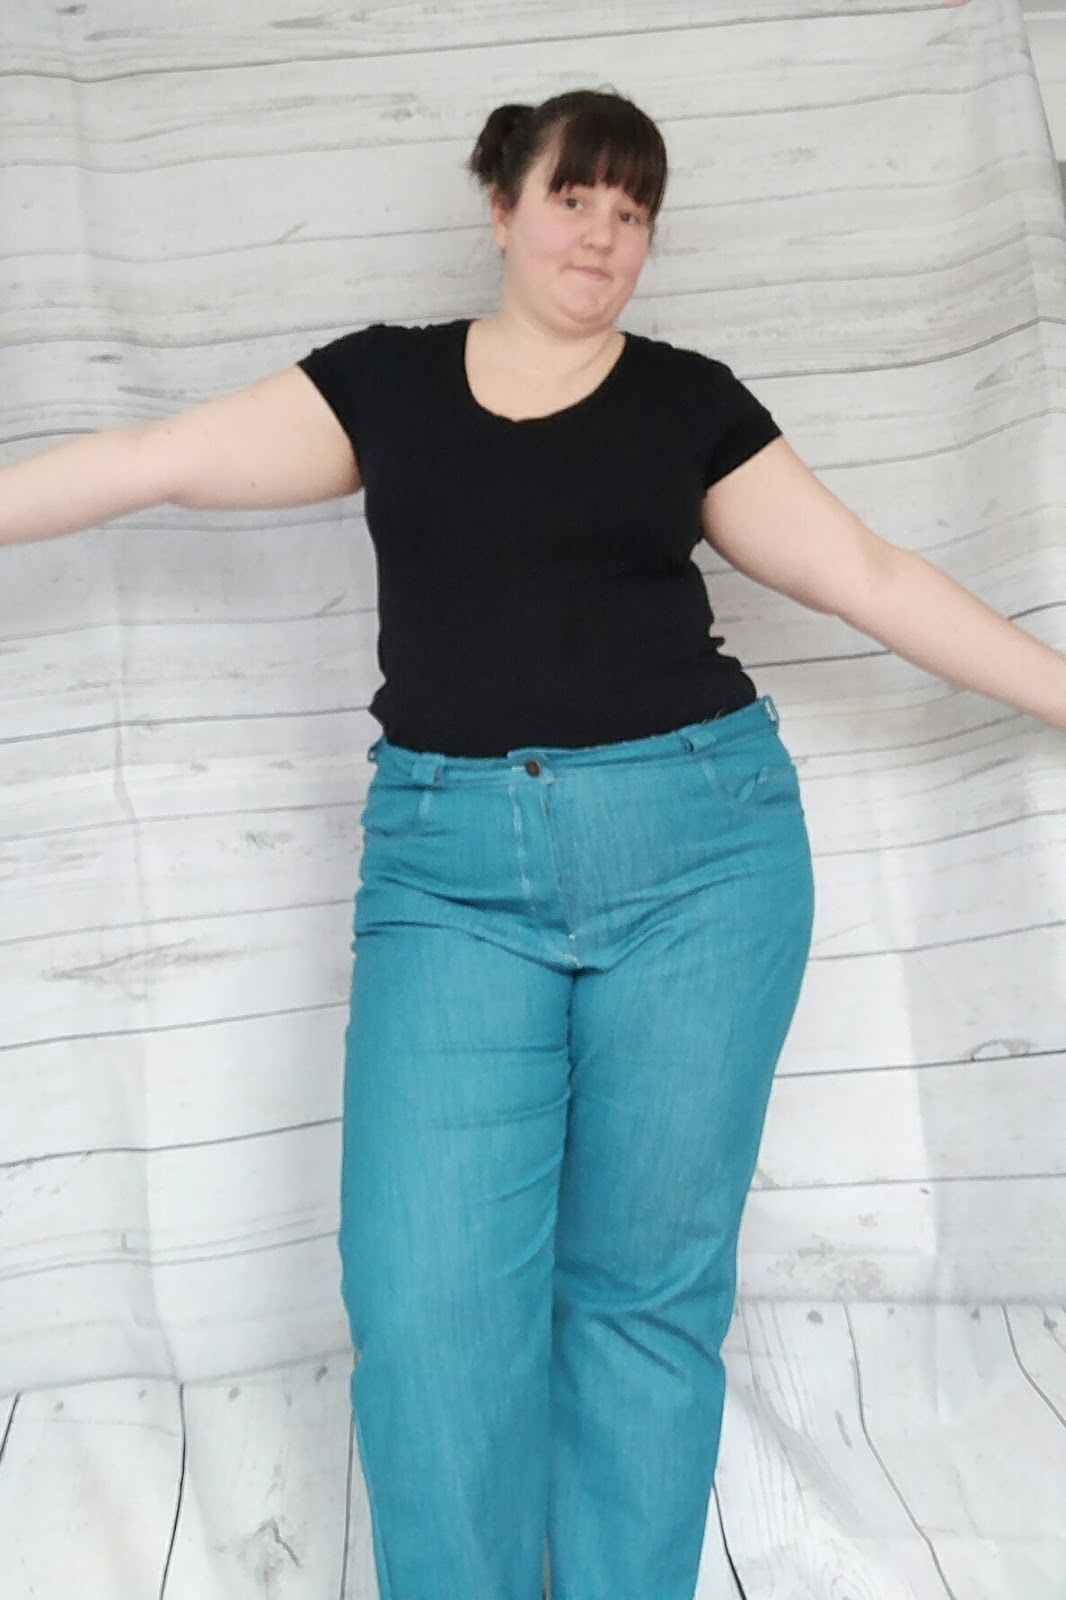
The denim I'm using is from Sew Crafty Online and it have an ever so slight stretch in it and the colour is just beautiful! The Morgan's pattern doesn't call for stretch denim but I thought I'd take a risk and since I was cutting the top end of the pattern I thought the stretch may help with the ease so I wasn't uncomfortable. And boy was I right!

The pockets on these really confused me for a little while but in the end I read the Ginger jeans sew along and it all clicked into place. I have attached the coin pocket to the wrong side of the pocket fabric which was then causing it to the wrong way around. Making jeans pockets was quite possibly the most rewarding sewing I have done in a while! All of a sudden it works and looks just like that RTW pair you have in your wardrobe! I had an issue with attaching the fly but that was just me being lazy and not using enough pins which I soon rectified. Check out my Instagram stories archive and you will see what I mean.

Deciding where to put my back pockets was a bit of a trauma, I basted the jeans together to see where I should put them but because I was home alone it's near on impossible to look at your own arse and pin a pocket on straight! So I gave up and copied a pair of RTW jeans I have by laying them flat and drawing points of the top two corners and using that for my Morgan's pockets. This worked really well as you can see.. (excuse my giant bum in your face but POCKETS!)

I used this gorgeous daisy print for inside my jeans and continued with my Rainbow overlocking thread. I'm drawn to anything with Daisy prints on as my first name in Guiding was Daisy (like Brown owl in Brownies) so it always has a place in my heart. The waistband and pockets and the rainbow overlocking make me want to show everyone the inside of my jeans too! Like you don't get that in RTW jeans do you!

I still have a slight fit problems with the waist over my bum, but I think I have worked out how to fix that in my next pair by reading through Closet Case's fit instructions which are really comprehensive if you too are wondering how to make them better. I don't mind though as all my RTW jeans have this issue so I nearly always have a belt on with them.

I have rolled up my hem because a. I love my some rainbow overlocking on show, and b. I really love the 'wrong' side colours in this fabric so thought this would be a lovely contrast. Also I didn't use topstitching thread just plain cream and I think this works perfectly against the turquoise jeans it didn't need heavy topstitching taking away from the awesome colours!

I have even attached the rivets and buttons! I used a hammer for the button fly, which was not scary at all and actually quiet therapeutic I think I might make everything a button fly from now on. I used the vario pliers to attach the rivets. I put one either side of the pockets along the side seam by the bar tacks which really gives you that professional finish! I may add some onto the belt hoops but I want to wear them a while before I decide about that.

If you want to see how I got on progress wise I've saved all my pictures on my Instagram archive so go check it out!

Wednesday, 31 January 2018

Straight Stitch Designs Madrona Skirt

I was lucky enough to be part of the Straight Stitch designs testing team for the Madona skirt. The first time I saw Kimberly post this on her Instagram I was instantly drawn to the girly floaty front petal shape of the skirt and how lovely and unusual it was, THEN I saw she wanted pattern testers so I jumped at the chance!

I used this beautiful Vicose Rayon from Sew Me Sunshine with lovely dandelions on. I was torn between this and a plain mustard one as I thought the lovely frill may be better suited for a plain fabric but I did an office poll as we voted dandelions, and I can bu
y plain clothes not as easy to buy pretty fabric skirts!

The viscose has a lovely drape to and even so walking around is floats around and will be perfect for a spring dress or skirt. I don’t think I’ve ever sewn viscose rayon before but it’s very like cotton lawn to sew so nice and easy and not slippery like you would think a viscose is.

The skirt is super easy! It’s two pieces with a French seam joining the back then a waistband! I have decided my favourite method of creating gathers now is to sew elastic on so I did that again to create the even gathers around the waist. I just large zip zag a piece of ¼” elastic all around the top, stretching it as it sews, then when I let go of the stretch it gathers the fabric beautifully!

I made the waistband a little wider than the pattern because I found the most amazing button that matches perfectly. It was brilliant timing as I was making this skirt at our Sewing day at The Cambridge fabric company. When I popped upstairs to the shop for the elastic which I forgot to bring, I saw these ceramic buttons in a little basket on the till. It matches so perfectly it’s almost spooky!

In my excitement of matching buttons, I put my button hole the wrong way up! I put it portrait when it should be landscape but I have remedied this by moving the buttons along to where they sit nicest of my waist.

I can’t wait for the warmer weather to wear this without tights and some lovely summer tops (think ALL the Ogden Cami’s!)

Big thanks to my photographer Lisa for taking these at lunchtime on our day job, anyone else struggling with daylight to get nice photos this time of year?!

Saturday, 23 September 2017

The British Heart Foundation the Big Stitch

When I saw the British Heart Foundation challenge, The Big Stitch, I knew I had to do something towards it. There is a lovey lady at work who has recent' had a lt of heart troubles yet she's spending a lt of energy fund raising for the BHF so I thought i owl try and help her. what made it even better was she is crafty like me so I got her involved too!

I knew I wanted to go big, i mean go bit or go home right? So I set my heart and buying either a suit or a wedding dress. looking back now I think i was ahead of my time with the refashioners now being suit themed! ha! 

I found the perfect dress on the BHF ebay page set set about bidding. This dress had the most beautiful daisy lace all over it so I knew it had to be mine as Daisy's have always been my thing! I eventually won it for just under 15 and then got it posted over to me. 

When it arrived it smelt pretty bad of moth balls, and had a kind of tissue paper in the underskirt which must have been to keep it stiff. I hung it out on the line for a few days and the smell started to drop. I cut out the paper bit and shoved the whole thing in the washing machine! It survived pretty well considering! the I set upon deconstruction. 

I took the top from the skirt first and I made the whole dress just from the skirt in the end so i have plenty of lace to play with another day, bonus! once the skirt was apart from the bodice, i unpicked the lace around the hem, all the way around. About a million miles of it! I thought I would put this back on the new dress which i did and i think it gives it a lovely finish.

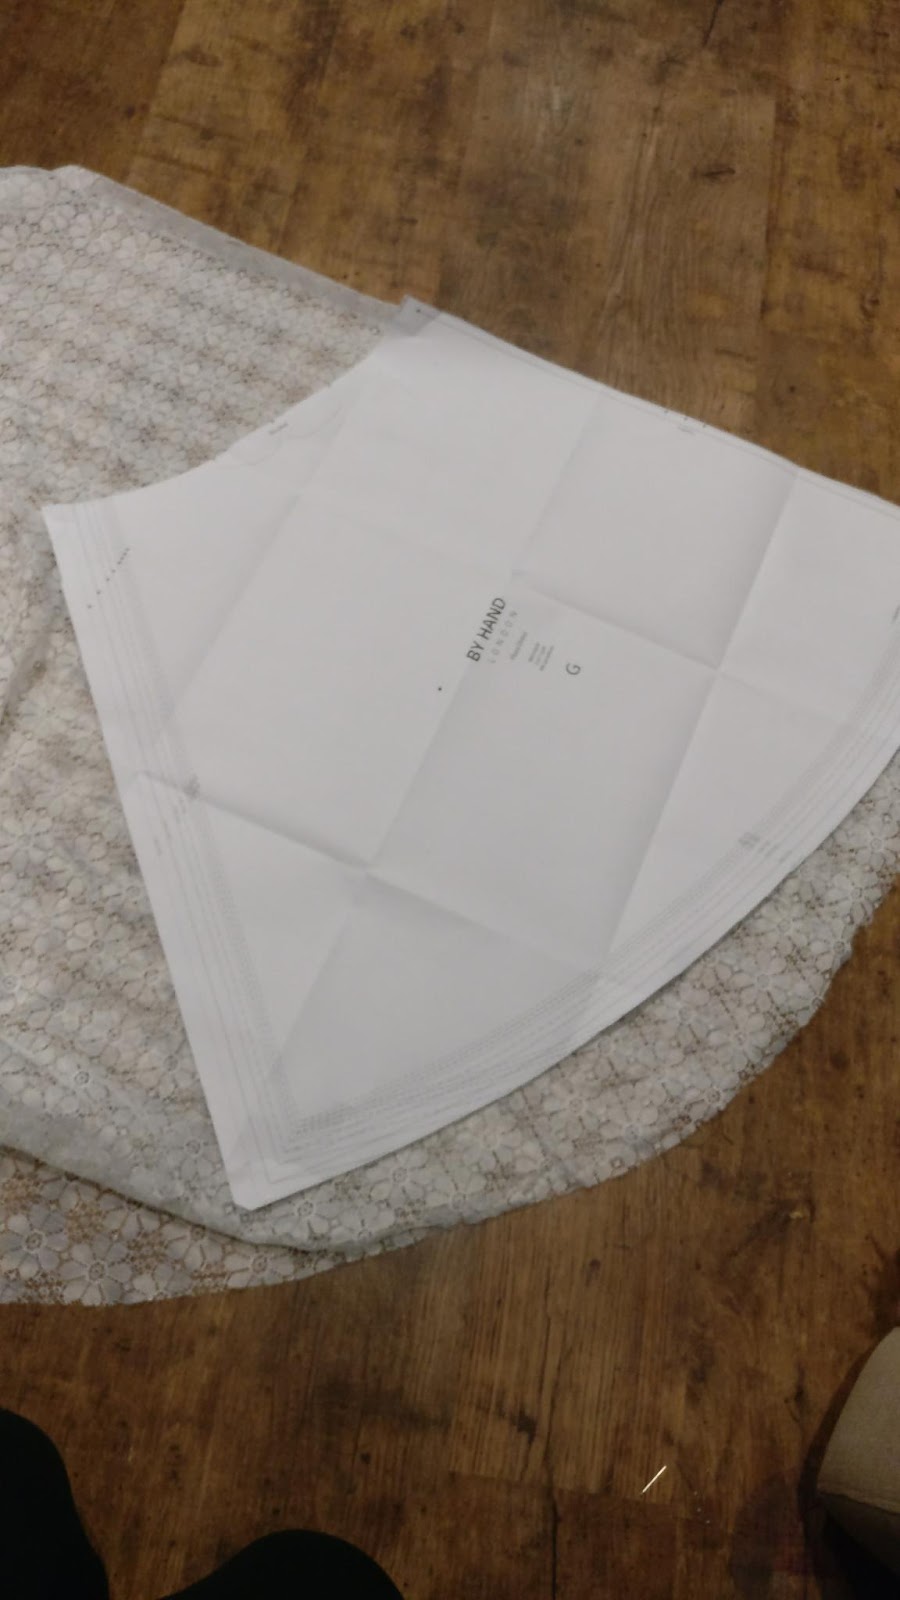
I decided to make the By hand london flora dress, which is a shape of dress I have been looking for a while. High neck and fitted bodice but flowing skirt so this seemed perfect. I cut all the pieces out from the skirt and I used the lining of the skirt to line the dress too. Even the zip I unpicked was the right length, it all fitted perfectly!

We had a bit of a construction party at work where we all brought our projects together and took over one of the lecture rooms. It was great as the skill levels were all so different we helped each other out! Angela made a kaftan out of a maxi dress for her beach holiday, Amy made a pillowcase dress from a duvet - Amy hadn't sewn since school and she took to it like water off a ducks back! Lisa made a handbag from a pair of trousers and a skirt and Jenny made an Ogden cami from a maxi dress! We got pizza delivered too it was fabulous!

Once I had put together all my pieces and sewn back the lace around the hem I decided it was unlikely I was ever going to wear a white dress so I tried to dye it! 

In hindsight I should probably have used a more dramatic colour change, but I dip dyed the dress yellow. The colour didn't stick very well to the lace as I think it was so synthetic it just washed straight out of the lace but did stick a little on the lining and gave it a lovely sade of pale yellow that it impossible to photograph! but it's yellow honest! 

I might re-dye it purple or something brighter so I can wear it more but it looks good in the mean time. I think I used the wrong size top for me as I thought I needed to grade out for my boobs, but I've since made another on and I used a small bodice size and just graded out the waist and it fits me much nicer, so I my take my wedding dress dress in a little but all in all I love how it tuned out!!

Wednesday, 13 September 2017

The Fairfield Shirt by Thread Theory Designs

My first foray into shirts was this tread theory designs shift for my husband. he's been asking me to make something for him for ages but since my hexie quilt is going no-where fast I thought I'd make him a fancy shirt. For this shirt I used the beautifully soft Dashwood sudios cotton that I got from Sew Crafty online. This particular range is called bird song, if you look closely the pattern is lots of groups of birds flying in formation, i kinda love it's peacefulness, yet business. It's a lovely pattern and sill doesn't seem too busy.
The shirt pattern form Thread theory comes with to styles of back, pleated or darts. it also comes with t front shapes, 'slim fit' an 'rounded belly'. I made the pleated back and the rounded bely because using hubbys measurements his shoulders and waist measurements fitted this style front best.
The best bit about this pattern is how easy everything comes together but yet looks like a really difficult make. I mean don't get me wrong I had to practice, which I did using the ASDA duvet for the mexican party, the collar on that one is truly awful but practice makes perfect and that's why you practice!
As you can see the back fits lovely across his shoulders so I know I used the right size. The burito method is brilliant for shirts! Having never done this before I read the instructions and ended up a bit flummoxed, but once I watched a video on how to do it the instructions made loads more sense so I used these for making the next shirt.I like (and so does hubby) he pleated back because it leaves it nice and floaty and when i made this is was very warm and summery!
I probably could have made the normal front of the shirt despite his rounded belly. As you can see it sticks out quite a bit over his belly but hat is probably because it is balancing on the front!

Please excuse his terrible line up pictures, he's not a good insta husband and doesn't really like having his picture taken! This is his off to a family Bbq back in July so the sun was out but he has since worn it tucked into jeans for going out for inner and it works really nicely. I'm planning on making more of these as christmas presents for all the men in my life as they can easily be made and are a lovely heart felt gift! 

Tuesday, 30 May 2017

The Dressmakers Ball - the low down!

Have I mentioned I had a fantastic night at the Dressmakers Ball, I'm sure I haven't talked about it too much!

So let's start with my outfit, I desperately wanted to make my own version of Meryl Streeps Oscars outfit. I loved the class of trousers with a big fabulous skirt, which made a feminine and practical outfit!

So I set about a re-make.
I made my trousers and my top with lovely yellow scuba I fell upon on eBay and they happen to match my skirt flowers. My skirts scuba again was from Minerva, which when they arrived were a perfect match!

I've never made trousers! So I bought the Sew Over it London Ultimate Trousers. These trousers didn't say I could make it from scuba so I guessed and winged it! It worked out well but because of the ease they were a tad huge! So I took in the back darts in order to stop them falling down.
I made the Bardot Top using fabric godmothers tutorial that I discovered whilst doing my jeanius upcycling last year. It's essentially two rectangles carefully sewn together so they make a lovely folded over top. In the tutorial it says to add elastic which I haven't done as I used scuba and the stretch was enough in it.

My skirt is a 3/4 circle skirt which I finally worked out the maths on! If you are interested to make the waist radius = 1.3 * (waist measurement-2) then all of that divided by 2Ï€. I cut a half circle and a quarter which meant it all fit on 2m of fabric. I then cut a sweeping curve out the front allowing people to see the trousers I'd so lovingly made underneath!

I went to my lovely sisters and she did my hair and make up for me, because she's wonderful but forgot to tell her my quick time frame so was late to pick up the Jenny from Jennystitched. We scooted off to Leicester at a rate of knots and met Megan from pigeonwishes at Jenny's hotel. After a quick turn around and get changed we jumped in the car to avoid the rain. But we got lost and couldn't find the venue so we abandoned the car and followed our phones to the venue!

At this point I was utterly starstruck. It was so amazing to meet all the fantastic Sewing community that I have come to know and love on Instagram. We had a lovely dinner then there was the catwalk of all of our outfits. I had to very careful not to spill my dinner down myself!! The dresses were absolutely incredible. I decided to enter in the beginner category as I've been sewing less than 3 years. The lady that won my category had only been Sewing since September and her dress was amazing! I was really pleased to get a special mention in this category too so the judges obviously loved my outfit.
 
Once we had catwalked the experienced category went next. These dresses were inspirational! Everyone fantastic and something to aspire to.

Then we had cake. Told you it was a good evening! It got even better when Gabby Young and other animals started playing and I had a perfectly swirly dress to dance with. Special mention to Gemma from agirlsewgeeky for fangirling with me whilst everyone danced!

We got lovely goodie bags too! What a night. It was so lovely to meet everyone and I can't wait for the next meet up.

Thursday, 13 April 2017

Pattern hack of the Sew Crafty Shift dress


Well ladies and gentlemen please be upstanding for my first ever pattern hack! Introducing my Sew Crafty Online Shift Dress in exquisite Dashwood Distant dreams.

today i’m excited to share the lookbook for the newly launched label bon george. this los angeles-based collection was created with a simple philosophy: keep it conscious. all of the pieces are inspired by vintage in classic, wearable designs, always with sustainability in mind. our american-handcrafted garments are designed, sourced, and assembled locally in los angeles … … Continue reading →: I said in a previous blog i'm not very au fait with how patterns are made, or when I should be making adjustments so I played it safe with this hack. I added a button panel all down the front as I saw a fabulous 90's revival dress on pintrest with the same idea (Link).

At first I made the size up from what I thought I needed so that I could have a baggy shape as I could imagine it being lovely and baggy with the buttons being a delicate detail. I ended up with a potatoe sack as I over estimated my sizes! As you can see by my face, it's not what I envisaged! I ended up taking some out the shoulders and some out the sides, making it back to the size I should have cut out in the first place! Lesson learned. In doing this though I've made a little cap sleeve almost which I love!

I also added a 2" panel on either side to use as my buttons basis. I layered that up with fabric to make it a little stiffer but I didn't want to use interfacing and may it too stiff so just doubled up on fabric. I then had the fun task of buttons all down the front. I put the 4cm apart as I guessed that seemed a good distance but actually that left me with A LOT of buttons to sew on. I used big buttons so they became the center piece and the colours match perfectly with this Dashwood Studio Distant Dreams. I love the peacocks and the colours as it is so very springy at the moment and perfect!

I may have finished my hem last night and be wearing it at work already! Typing this blog whilst scoffing my lunch, and I have had so many compliments as to how nice I look today. As usual I love it! My new favourite dress, perfect for Easter Sunday!


Friday, 7 April 2017

Pattern testing for Studio TKB - The Fallon top!


This is the first time I have ever done a pattern test, and I LOVE IT!

I was a little disheartened at first as to be perfectly honest I really don't know what I'm doing when it comes to fit and there were people talking about arm scythe, like what even is that?! but i survived in the end.

This Fallon top has a lovely front side seam which makes it very flattering and lovely and floaty. You can change the sleeve lengths very easily and I think my next one will be 3/4 sleeves for evening cooler nights.

I think it's easily dressed up or down with jeans or a skirt, here I am in my works trousers so very boring but I think the top brings out the best in it!

My first tester I made out of very cheap jersey which had very little drape really, I son learnt from this as it looked really odd and was very tight and restricting, as you can see (excuse the slippers!). So I thought hard about what fabric to use for my proper one.

I made the next one in exactly the same size (size H) with no alternations. I could probably do with a little extra wiggle room in my chubby arms but I thought it would be good to test the pattern to it's full. The new fabric is a very lightweight jersey, I got from Peterborough market about a year ago, at £1pm!! I've been 'saving' it for the right project and here we are!

I did the 'false bow' neck line the Tina put in the back on the instructions as I wanted to try something different and I wasn't confident on my abilities for a neat neckline I thought I could hide it with a tie! I think it also works really well with the relaxed style of the top and finishes it off lovely.

For those of you who have the new LIDL singer overlocker, I did nearly all this on my overlocker! Just the hemms and the neckline on my normal machine, It was so quick and easy and lots of straight lines so it's a great start!

I loved it so much I've worn it to work today and had a few people asking if I make to order, and I think my Mum will like it too as it has a long back to keep her lower back warm but it still nice and floaty.

                                                                    Here's to Fallon!!

Wednesday, 22 March 2017

Jumping on the bandwagon - Tilly and the Buttons Cleo Dungadress

Ta Daaaaa.

I finished my new Dungadress, and I think I am in love! The Cleo by Tilly and the Buttons is fabulous. It is the first time I have used dungaree clips, and the first time I have done any top stitching so I am still working my way through all my firsts.

I ordered a meter and a half of Denim fabric from Sew Crafty Online which was more than plenty! I still have quite a bit left and was thinking of projects to stash bust with some hard wearing denim. I already had some top stitching thread, which to be perfectly honest I had ordered a good while ago by accident as I needed some normal thread the same colour for my Daisy Dress and didn't realise there were different types of thread! This is how far I have come in the last year of so, yet this project taught me I probably needed a top stitching needle but I managed ok.

The denim was easy to work with which I was surprised about and it wasn't too thick so I used a normal need rather than a denim one. The hardest part I found was turning the straps the right way, so I got out my giant knitting needles and it did make it easier.

I only did one line of top stitching mostly because I ran out of thread, but also I think it makes it a bit more unique. I didn't even have enough thread to do the hem but actually I love the frayed look! I have done a line of zip zag in an inconspicuous black just above the hem so it won't fray too far.

Here is a picture of the whole dungadress with added Murphy dog the cockerpoo! He loves it too.


Thursday, 16 March 2017

The Moneta Party


I so very much enjoyed the Moneta party! Isn't it amazing how one pattern can look so fabulously different on different body types, shapes and different fabrics too! And the pattern hacks, wow! Some of them have truly inspired me to work out how to hack a pattern as they looked fabulous! I especially love the maxi versions, and the backless version and well erm everyone's versions!

I made my Moneta in one size down from the maximum which account to my measurements should have been my size. I think my problem was I went with my largest measurement which is my bum and that then left the rest of the dress a bit tent like and the skirt bottom is gathered and oversized anyway.

I have never gathered with elastic either, but I did cheat slightly and I used white 1/4" elastic instead of clear elastic but it seems to have worked perfectly for me.

This was also my first time using a twin needle, which was a lot less scary than I thought it would be and finished off the neckline, sleeves and hem.

Once I put the dress all together it looked really potato sack like, so I took it back to the drawing board. Whilst wearing it I could pinch in a few inches at my waist each side, so I took it off and ran my overlocked from the armpit seam to the point I could take it into on the waist, I then did another line up to the pocket seam. This then gave the dress a synced in waist but had enough room f
or my boobs and bum! Perfect for me!

My zigzag fabric is from my favourite fabric store Sew Crafty Online. This fabric is a super light microfiber type jersey, which washed and dried so quickly and lovely. No creases! Not that I iron if I can help it anyway!

All in all my new favourite pattern. I also may have a slight obsession with buying jersey now as it's not half as scary as I thought it was!

Friday, 10 March 2017

Baby Clothes - The cutest things!!

There seems to be a lot of baby's around in my life at the moment, so I thought I would have a go at making some gifts for them! Sadly I can't claim the beautiful knitted cardi's as my own, my beautiful Grandma made those and she is such a speed knitter too.

I then made a couple of sets with car seat blankets like I have blogged about previously at this link.
Baby Car Seat cover. The parents I have given these too love them as the keep the car seat clean and it's easily washable but it is great for swaddling the baby in and keeping them warm without them being able to kick the blanket off in the back of the car.

I also had a go an some little hat's and matching leggings, as I knew each baby would be a little boy.
I made the knot hats using this tutorial from How Does She's Blog.
I used my overlocker for the entire of this hat, which made it so quick and easy. The band around the bottom of the hat is added on after so every bit can be done on my overlocker. I was quite scared of my overlocker till I made these projects and now I have mastered curves!

The little trousers were a pattern from Made by Rae with her Just Hatched Leggins pattern which again is so easy. It only has two pattern pieces and a small amount of elastic which makes them very easy to create. I had to do the cuffs and waist band on my normal machine for these but using my walking foot it gave them a lovely professional finish.

I bought this Horsey fabric especially for this gift as the Mum works with horses and the Dad is a farmer, hence the tractors on the car seat cover.

I made another car seat cover without the double layer, just a single layer of fleece which worked really well also. It then meant it was even easier for swaddling and washing as there is only one layer to get tangled.

All in all some very cute babies with some very cute iddy bitty presents!

Tuesday, 7 March 2017

Winslow Culottes in crepe!


Two firsts for this project! First some kind of trousers, with a gusset and pockets and everything, also first type using a slippery material like crepe.

The beautiful Crepe was from Sew Crafty Online and the flow on it is lovely. There are so many beautiful colours on the fabric I had too many to choose from for my jacket! Please excuse hubby's stupid face! Doh!
I really enjoyed this pattern though as it has minimal pieces and I am beginning to love PDF patterns as I don't have to trace them out and they seem much easier to store than rolled up grease proof paper!

There are 4 pieces for the 'legs' and a waist band, two pockets and a zip. So a nice easy sew really. I've never really made trousers before that have looked suitable for wearing outside the house!

I struggled with the fabric really as I have never used crepe, it seemed to creep a bit whilst sewing as I think my tension was a bit too tight. After I had done a few seams I changed the tension and it seems to ease off a bit. I used my normal foot for this but I'm told a roller foot may have been a better option for me, so that's one to try next time!


I love these culottes as they were so comfy all day at the wedding, I could dance and move around not worrying about skirts exposure, and they still looked formal enough for the wedding.

I think I am going to make myself a long pair of these for the summer as the waist band hit me at a really nice 'high wasted' point perfect with baggy tops. Made in crepe they will lovely and floaty for the summer too. I think I may experiment in a thinker cotton too for some for work as the shape really suits the shape of my body.

I really do recommend trying out the Winslow culottes!

Tuesday, 20 September 2016

My Project for the Refashioners 2016 challenge

What a great idea to reuse jeans in this way! I don't know about you but I had load's of jeans in my house desperate for re-use! I flitted around my ideas but finally decided on a bardot style off the shoulder top.

I looked around on pintrest and found Fabric Godmothers tutorial and thought this was a great starting point.

I started by making the darker jeans one big piece of fabric, mostly because at the beginning I was going to make a dress but I didn't have a big enough piece. This piece then became the top frill of my bardot top.
I then made sure I had enough of the lighter jeans. Now this pair of jeans were bought with 'designer' fraying already put in, which just got bigger and bigger of a hole! So I had to repair these holes before I could use it as the main bodice to my top and not expose myself too much! Once that was done I cut two rectangles one 40cm deep and one 20cm deep.

I used the jeans hem for the bottom of the bodice and I zigzagged in contracting cream thread for the frill which I think gives it a nice finish. One I had made two tubes of fabric, I attached them using the wonderful tutorial above.
I only had thick elastic in, and I'm impatient to wait to go to a shop, so I pushed that through the frill's tube opening I had made. Whilst we are on the subject of threading elastic through.. there HAS to be an easier way to do this?! this is what took me most of the time!tip and tricks most welcome please!

When I first put this top on my husband laughed at my soo much as I had tried it on over my t-shirt and put the frills on top of my shoulders like a vest top, once I rearranged it looked much better (shame about my tan lines though!)

There are so many great adaptations of using jeans to make something else so please check out the hashtag #therefashioners2016 and #jeanius and see what everyone has been making. I love how everyone has used it so different and I especially love the negative space removing the pocket gives you like on my shoulder details.